Image Editing Guide
Photo Resizer: Resize Images Online Fast
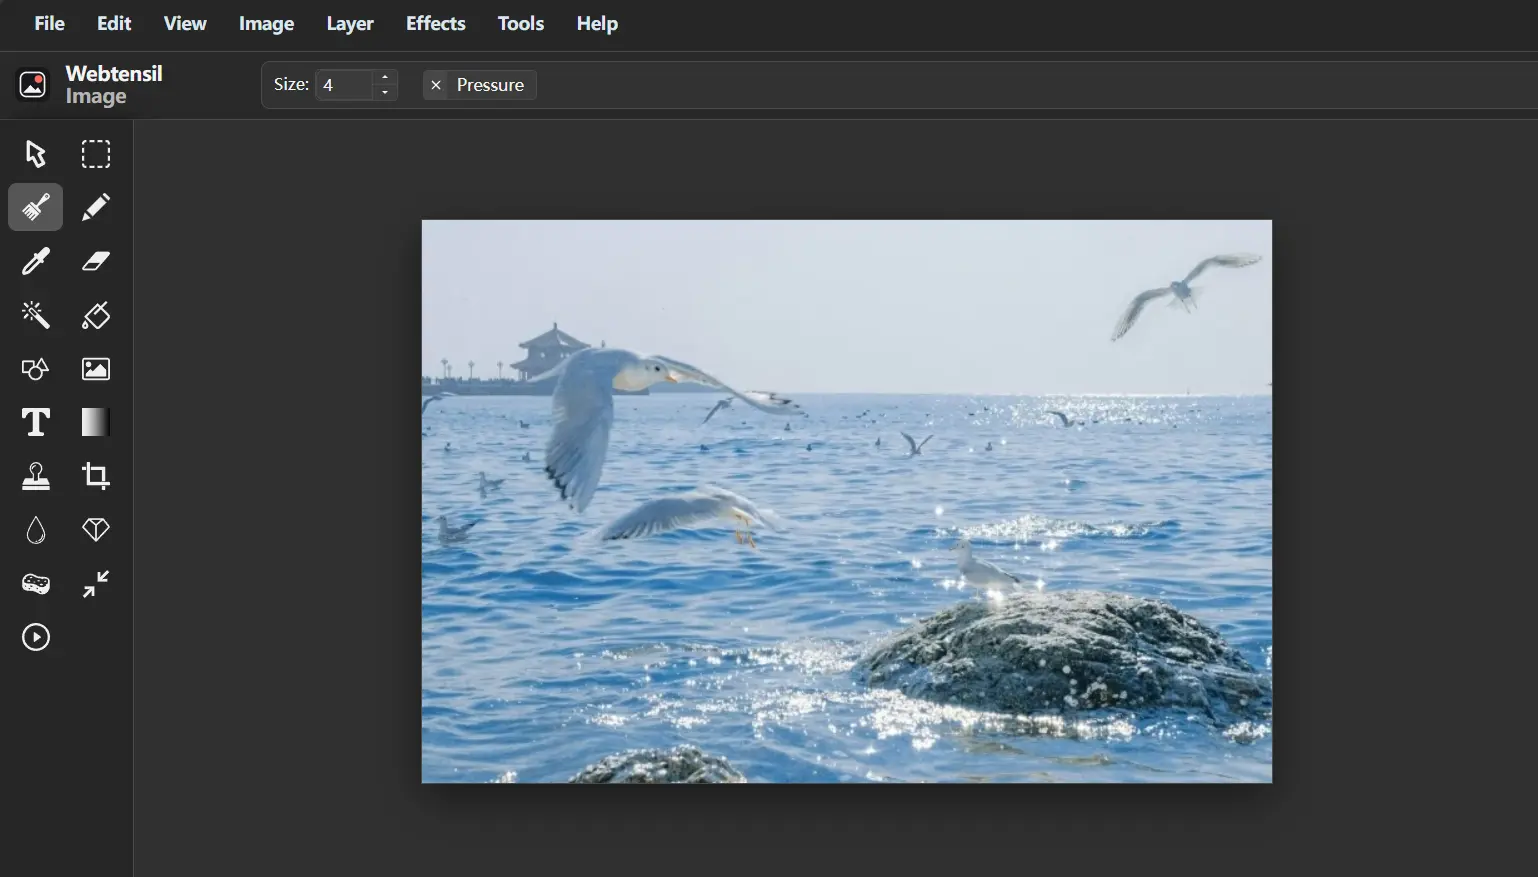
Images are an important part of modern online content. Whether you are creating social media posts, designing websites, writing blogs, or preparing client projects, image size often needs to be adjusted before publishing.
A high-resolution photo may look great but can be too large for a website, too slow to upload, or unsuitable for different platforms. This is why many creators use a photo resizer to quickly change image dimensions while keeping the quality clear.
For freelance designers and content creators, resizing images is usually only one step in the creative process. You may also need to crop photos, add text, adjust colors, apply filters, or modify design elements.
The challenge is finding a simple tool that can handle these tasks without expensive software or complicated workflows. A browser-based image editor can make resizing faster and easier while keeping everything in one place.
In this guide, we will explain how a photo resizer works, how to resize images without losing quality, and how tools like Webtensil Image can help creators build a more efficient editing workflow.
Why Use a Photo Resizer?
A photo resizer helps you change the width, height, or overall dimensions of an image.
Different platforms require different image sizes. A photo created for a website may not work well for social media, email campaigns, or online portfolios.
Common reasons to use a photo resizer include:
- Preparing images for websites
- Creating social media graphics
- Optimizing blog images
- Reducing large photo files
- Preparing client designs
- Creating different versions of the same image
Using the correct image size improves loading speed, makes files easier to share, and creates a better experience for users.
Photo Resizer: How to Resize Images Without Losing Quality
Many creators worry that resizing photos will make them blurry or reduce image quality.
However, with the right approach, you can resize images while maintaining a professional appearance.
Photo Resizer Tips: Keep the Original Aspect Ratio
One of the most important rules when using a photo resizer is keeping the original aspect ratio.
The aspect ratio controls the relationship between image width and height.
For example:
- 1920 × 1080 pixels = 16:9 format
- 1080 × 1080 pixels = Square format
If you change only one dimension, the image may become stretched or distorted.
A good photo resizer should automatically maintain proportions when changing image size.
Photo Resizer Tips: Choose the Right Image Size
The best image size depends on where the image will be used.
For example:
- Website images need smaller optimized sizes for faster loading.
- Social media posts may require specific dimensions.
- Portfolio images may need higher resolution.
- Client previews usually do not need full-size files.
Before resizing, think about the final purpose of the image.
Choosing the correct size prevents unnecessary quality loss and reduces editing time.
Photo Resizer Mistakes to Avoid
Even simple image resizing can create problems if done incorrectly.
Photo Resizer Mistake: Enlarging Small Images
Making a small image larger does not create new details.
If possible, always start with the highest-quality original image.
A larger source file gives you more flexibility when creating different versions.
Photo Resizer Mistake: Overwriting Original Files
Never replace your original image after resizing.
Instead:
- Keep the original file
- Create resized copies
- Save different versions for different platforms
This allows you to reuse images for future projects.
Photo Resizer Mistake: Ignoring File Size
Changing dimensions can reduce file size, but some images may still be unnecessarily large.
After resizing, check whether further optimization is needed.
Photo Resizer Workflow for Freelance Designers
Freelance designers and content creators often manage many visual tasks every day.
A typical project may require:
- Resize an image.
- Crop unnecessary areas.
- Add text or graphics.
- Adjust brightness and colors.
- Apply filters.
- Export the final design.
Using different applications for each step can slow down productivity.
A better workflow is using one editing environment where resizing and other adjustments can happen together.
Photo Resizer Features in Webtensil Image
Webtensil Image is a free browser-based image editor designed for creators who need fast and flexible editing tools.
Instead of only resizing images, it provides additional features that help prepare complete visual content.
With Webtensil Image, you can:
- Resize images
- Crop photos
- Manage layers
- Add and edit text
- Use selection tools
- Draw with brushes
- Adjust colors
- Apply blur effects
- Sharpen images
- Use filters
The layer-based editing system is especially useful for designers.
For example, when creating a marketing graphic, you can keep the background image, text, and other elements separate. This makes it easier to adjust layouts after resizing.
Why Use an Online Photo Resizer?
Professional design software can be powerful, but many everyday editing tasks do not require complex applications.
A browser-based photo resizer can be useful when you need to:
- Quickly resize images
- Edit pictures from different devices
- Avoid software installation
- Complete simple design tasks faster
Webtensil Image works directly in modern browsers including Chrome, Edge, Firefox, and Safari.
It does not require downloading software or creating an account, making the editing process simpler.
Photo Resizer and Image Privacy
Image privacy is important, especially for freelance designers working with clients.
You may work with:
- Private photos
- Client designs
- Business materials
- Unreleased marketing content
Webtensil Image performs core editing locally in the browser instead of requiring images to be uploaded to an application server.
This helps creators maintain more control over their files during everyday editing.
However, always follow client agreements and privacy requirements when handling professional projects.
What is the best way to resize images?
I use this free online tool to resize images.
How to do it in 30 seconds:
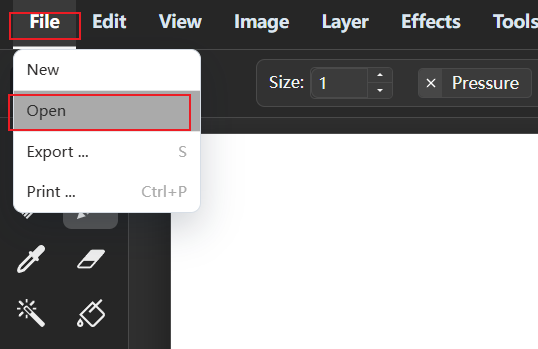
Step 1. Open a file
File > Open
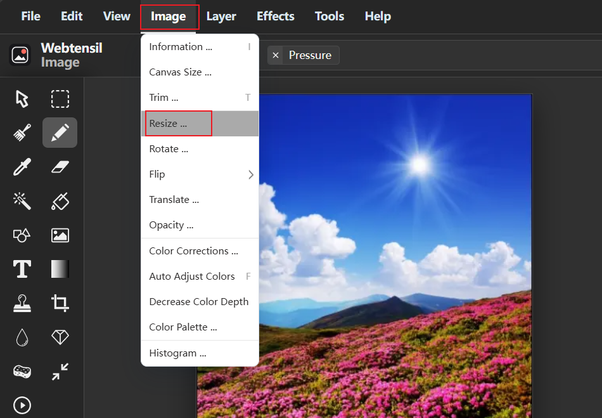
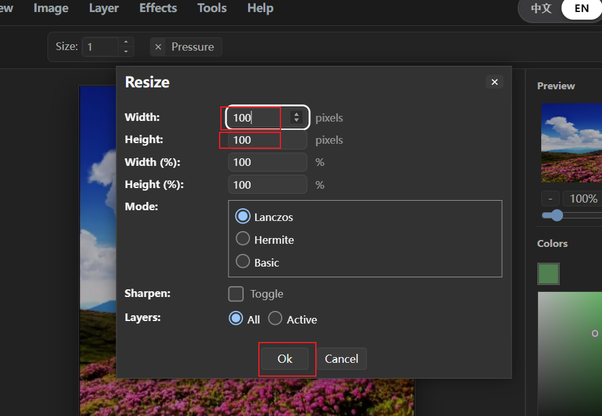
Step 2: Resize the image
Image > Resize
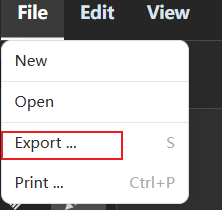
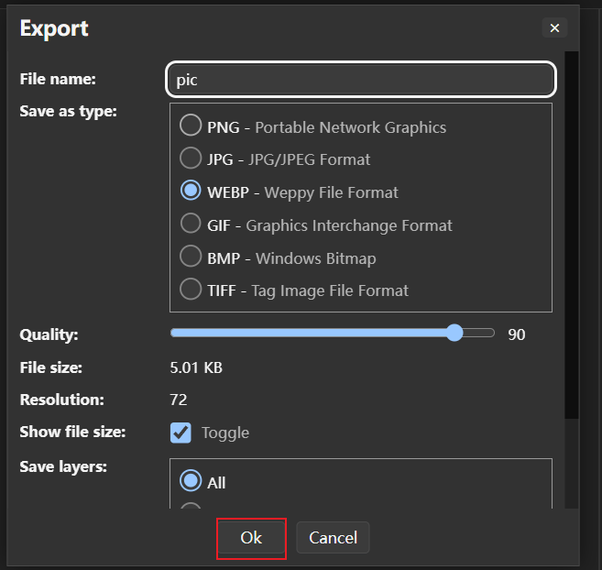
Step 3: Export the image
File > Export
Make Photo Resizer Part of Your Creative Workflow
A reliable photo resizer can help freelance designers and content creators save time and create better workflows.
The goal is not only to make images smaller. It is about preparing the right image size for each platform while keeping quality, flexibility, and efficiency.
With tools like Webtensil Image, creators can combine resizing, cropping, layers, text editing, and filters in one browser-based workspace.
By choosing the right dimensions and using a simple editing process, you can spend less time managing images and more time creating professional visual content.