Image Editing Guide
How to Change Size of the Image Online Without Expensive Software
A practical guide to resizing images, protecting image quality, and building a faster browser-based workflow.
If you work as a freelance designer, content creator, blogger, or social media manager, you probably need to resize images almost every day. A client may ask for a smaller banner, Instagram needs a different image ratio, or your website may require a specific width before you upload a photo.
The problem is that something as simple as changing an image size can sometimes turn into a much bigger task. Professional design software can be expensive, large programs take time to install, and complicated interfaces can slow you down when all you really want to do is change size of the image and continue working.
Fortunately, you do not always need heavy desktop software for everyday image editing. Browser-based image editors can handle common tasks such as resizing, cropping, adding text, adjusting colors, and working with layers.
In this guide, we'll look at how image resizing works, how to avoid common quality problems, and how freelancers and creators can build a faster image-editing workflow using simple online tools.
What Does It Mean to Change Size of the Image?
Changing the size of an image usually means adjusting its width, height, or both.
For example, you may have a photo that is 3000 × 2000 pixels but only need a 1200-pixel-wide version for a blog post. Instead of uploading the original large image, you can resize it first.
There are several reasons you might want to resize an image:
- Prepare an image for a website or blog
- Create graphics for social media
- Reduce oversized images before sharing them
- Match a client's required dimensions
- Create thumbnails and banners
- Prepare images for newsletters or presentations
- Make several versions of the same design
For creators who publish content across several platforms, resizing is especially common because each platform may require different image dimensions.
Resizing and Cropping Are Not the Same Thing
Resizing and cropping are often confused, but they solve different problems.
Resizing changes the dimensions of the entire image.
For example:
3000 × 2000 pixels 1500 × 1000 pixels
The full image remains visible, but it becomes smaller.
Cropping, on the other hand, removes part of the image.
For example, you might crop a horizontal photo into a square so it works better as a social media post.
In many real projects, you will use both tools.
A freelance designer creating promotional graphics might first crop an image to improve the composition and then resize the finished design to the required dimensions.
How to Change Size of the Image Without Losing Quality
One of the biggest concerns when resizing an image is quality.
Making an image smaller is usually straightforward. Problems are more likely to appear when you enlarge a small image significantly.
If you stretch a 400-pixel-wide image to 2000 pixels, the result may look blurry or pixelated because the original image does not contain enough detail.
Here are a few simple ways to protect image quality.
Keep the Original Aspect Ratio
The aspect ratio describes the relationship between the width and height of an image.
For example, an image measuring 1920 × 1080 has a 16:9 aspect ratio.
When resizing, keeping the same ratio prevents the image from becoming stretched or compressed.
If you change the width but forget to adjust the height proportionally, faces and objects may suddenly look unusually wide or narrow.
Whenever possible, use an editor that automatically maintains the aspect ratio while you resize.
Start With a Larger Original Image
It is generally easier to create smaller versions from a high-resolution image than to enlarge a very small image.
If you know you will need several versions of the same design, keep a larger master copy.
You can then create smaller versions for:
- Blog posts
- Social media
- Email campaigns
- Website thumbnails
- Client previews
This makes your workflow more flexible.
Avoid Repeated Resizing
Repeatedly opening, resizing, saving, and resizing the same image again can create unnecessary quality loss depending on the file format and compression settings.
Instead, keep the original file and create new resized versions from it.
A simple folder structure can help:
- Original
- Website
- Social Media
- Client Delivery
This small habit can save time when a client suddenly asks for another size.
A Faster Workflow for Freelance Designers and Content Creators
Freelancers often have to switch between many small tasks during the day.
You might be writing a blog post one minute and creating a Pinterest graphic the next. Later, a client may ask you to change the size of a banner before publishing it.
Opening large professional software every time can interrupt your workflow.
For many everyday tasks, a lightweight browser-based editor is often enough.
A practical workflow could look like this:
- Open your image in an online editor.
- Crop unnecessary areas if needed.
- Resize the image to the required width and height.
- Add text, graphics, or other elements.
- Make basic color or filter adjustments.
- Save the finished version.
Keeping everything inside one editing environment reduces the need to move between several different tools.
Using Webtensil Image for Everyday Editing
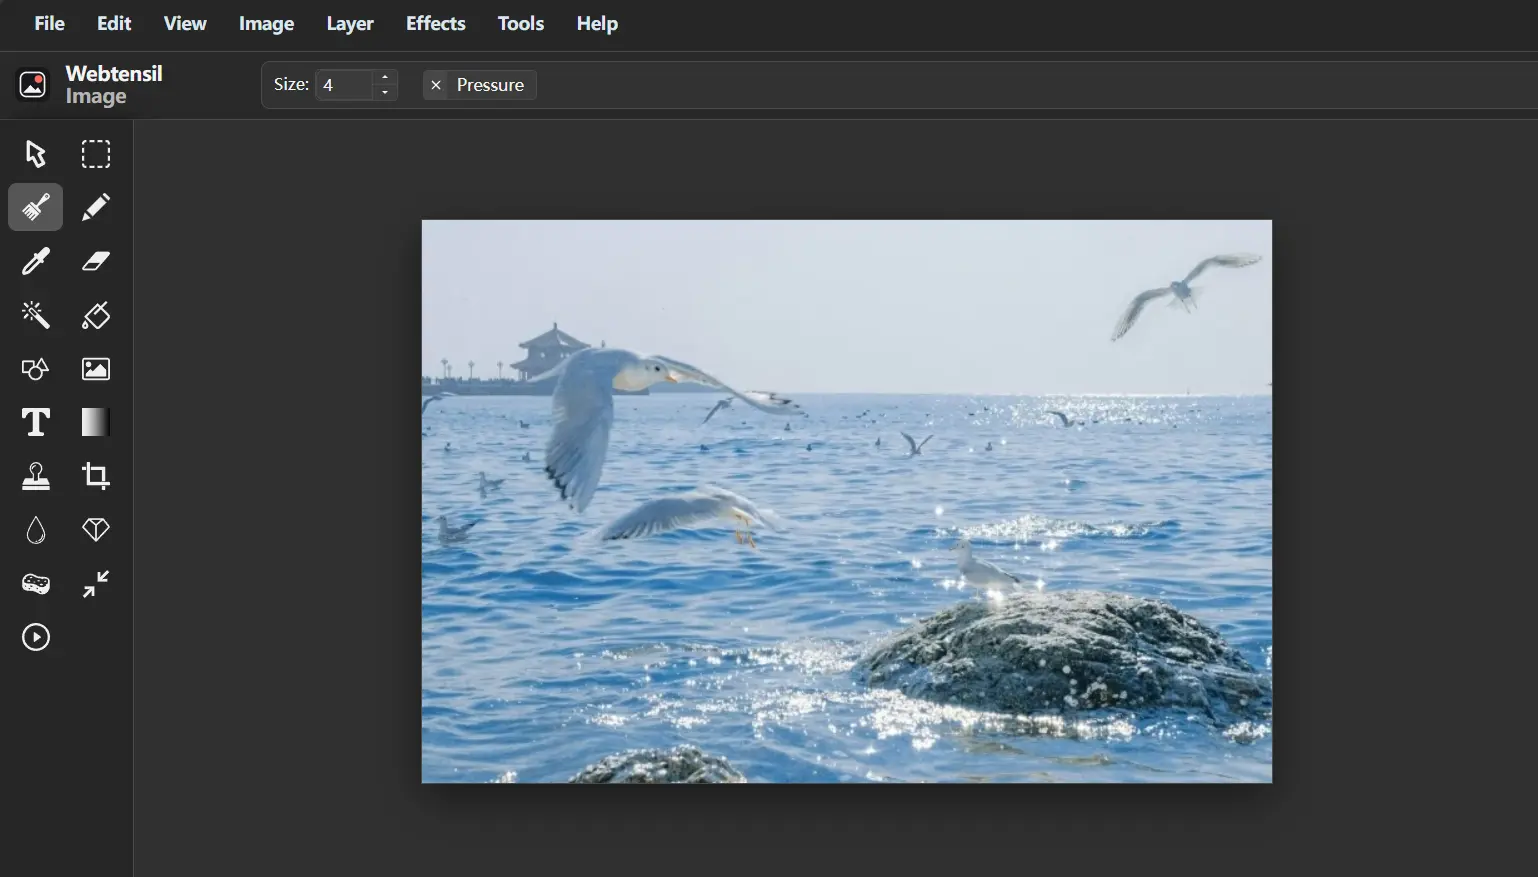
Webtensil Image is one example of a browser-based editor designed for quick image editing.
It can be useful when you need more than a basic resize tool but do not want to install a large desktop application.
For example, after resizing an image, you may realize that you also need to add a headline, move an image element, adjust the colors, or apply a filter.
Webtensil Image includes tools for:
- Resizing and cropping
- Selecting parts of an image
- Adding and editing text
- Drawing with brush tools
- Adjusting image colors
- Applying blur and sharpening effects
- Desaturating images
- Using different filters
- Managing multiple layers
The layer system is particularly useful for designers and creators because text, images, and drawing elements can be managed independently.
Instead of flattening everything into a single image immediately, you can rearrange or modify individual elements while working.
Why Layers Matter When Resizing Designs
Imagine you create a promotional image containing a photo, logo, headline, and button.
Later, you need the same design in a different size.
If everything is already combined into one flat image, adjusting the layout can be frustrating. Text may become too small, important elements may move out of position, and the overall design may no longer fit.
Layers make this easier.
You can resize the canvas or image and then independently reposition:
- Text
- Photos
- Graphics
- Drawings
- Other visual elements
This is especially helpful when adapting one design for multiple platforms.
A freelancer could create one main design and then reorganize the layers for a blog banner, Pinterest Pin, social media post, or promotional graphic.
When a Browser-Based Image Editor Makes Sense
Not every project requires advanced professional software.
Desktop tools are still valuable for complex illustration, advanced photo retouching, large design projects, and specialized production workflows.
However, browser-based editors are convenient for smaller everyday tasks.
They can be especially useful when:
- You only need to resize or crop an image
- You are working on another computer
- You do not want to install additional software
- You need to make a quick client revision
- You want to create a simple social graphic
- You need basic filters or color adjustments
- You want to add text or simple design elements
Webtensil Image works directly in modern browsers such as Chrome, Edge, Firefox, and Safari.
It also does not require creating an account or downloading an application, which removes a few steps from the editing process.
Privacy Can Matter When Editing Images Online
Convenience is not the only consideration when choosing an online image editor.
Freelancers may occasionally work with client graphics, unpublished campaign materials, screenshots, or other files they would prefer not to upload unnecessarily.
Webtensil Image performs its core image editing locally in the browser rather than requiring images to be uploaded to the application's server for processing.
For creators who care about keeping their editing workflow simple while limiting unnecessary uploads, local browser processing can be a useful advantage.
Of course, you should still follow any confidentiality requirements your client provides when handling sensitive material.
Choosing the Right Image Dimensions
Before resizing an image, think about where it will actually be used.
There is no single perfect image size for every situation.
Ask yourself:
Where will the image appear?
A blog image may need different dimensions from a Pinterest graphic or website banner.
Does the platform recommend an aspect ratio?
Check the platform's current guidelines before creating important campaign assets.
Will the image appear on mobile devices?
Very large images may be unnecessary for small screen displays.
Do you need multiple versions?
If the same design will be published in several places, start with a larger master design and create smaller versions afterward.
Planning the dimensions before you begin can reduce unnecessary editing later.
Simple Ways to Speed Up Your Image Editing Workflow
Changing image dimensions is a small task, but repeated small tasks can take a surprising amount of time.
You can make your workflow faster with a few habits.
First, keep frequently used dimensions somewhere easy to reference. If you regularly create blog images, thumbnails, or social media graphics, you should not need to look up your preferred dimensions every time.
Second, keep your original files. Never rely only on the smallest exported version.
Third, use layers whenever you expect a design to be reused.
Finally, choose an editor that matches the complexity of the task. If you only need to resize, crop, add text, and make a few visual adjustments, a simple browser-based editor may be faster than opening a complete professional design suite.
What is the best way to resize images?
I use this free online tool to resize images.
How to do it in 30 seconds:
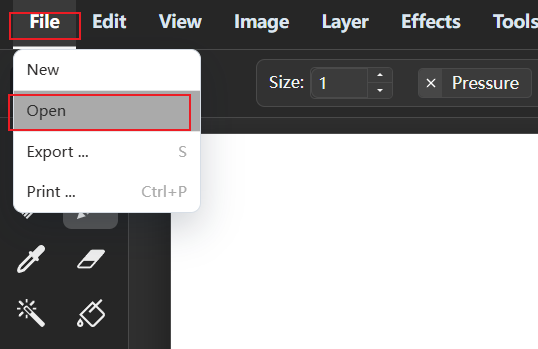
Step 1. Open a file
File > Open
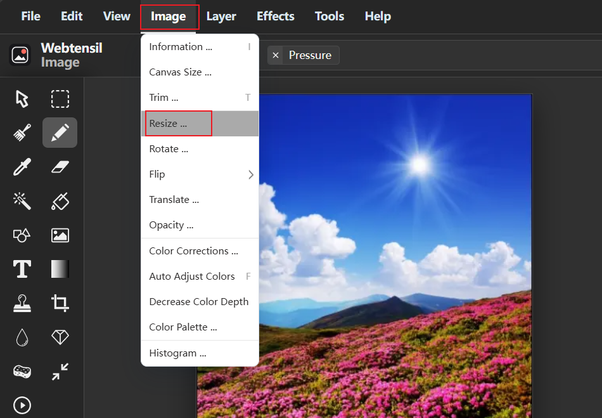
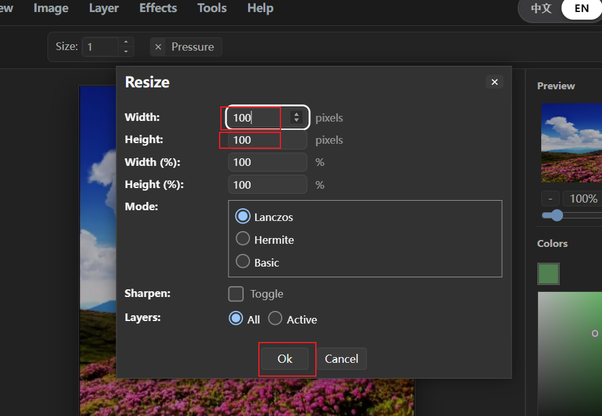
Step 2: Resize the image
Image > Resize
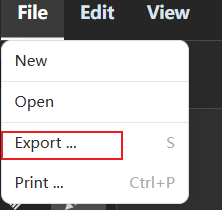
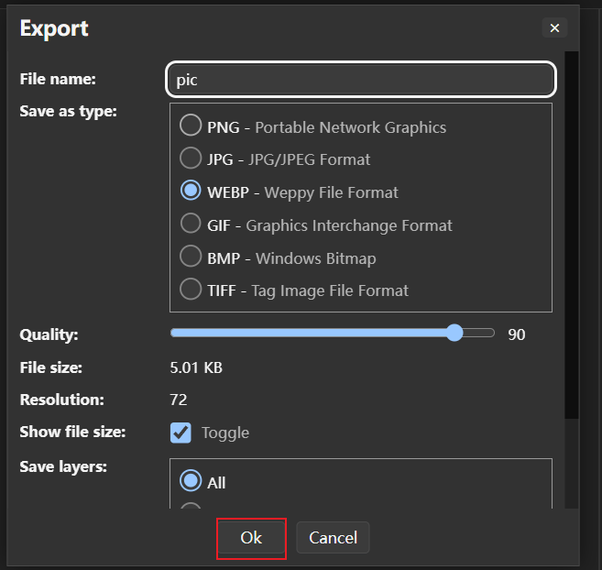
Step 3: Export the image
File > Export
Change Size of the Image Without Slowing Down Your Workflow
Resizing an image should be one of the simplest parts of your creative process.
For freelance designers and content creators, the best approach is usually to keep a high-quality original, maintain the correct aspect ratio, avoid unnecessary enlargement, and prepare different versions for different platforms.
You also do not need complicated or expensive software for every small editing task. Browser-based tools can handle resizing, cropping, text, layers, filters, and other common adjustments without adding extra installation steps.
Webtensil Image is one option for creators who want a free online image editor that works directly in the browser and includes useful everyday editing tools.
The main goal is simple: choose a workflow that helps you spend less time fighting with software and more time creating the content you actually want to publish.